How to use Xcode to export an app for security testing
Posted by Andrew Hoog NowSecure Marketing


NowSecure Marketing

To assess the security of an iOS app when it runs on a physical device, security analysts need a properly exported app from their development team. We have a lot of experience helping security analysts and developers overcome the challenges of exporting an iOS app so that an .ipa file can be tested using our mobile app security testing solutions. In this post we will demystify how to use Xcode to export an app for security testing.
This is the second of three posts about security testing Damn Vulnerable iOS App (DVIA) – a popular app for learning how to perform penetration testing on iOS apps. As a whole, the blog series explains how to:
- Compile DVIA for iOS 10 and Xcode 8
- Export a mobile app such as DVIA for testing (the topic of this post)
- Write an automation script for exercising DVIA (coming soon)
While Apple publishes instructions for exporting an app for testing, Apple security rules can confuse and frustrate developers and security analysts when trying to do so specifically for security testing. Developers can export an iOS app through Xcode, command-line tools, or SaaS services. They can then distribute apps in a number of ways: via the App Store, through the Apple Developer Enterprise Program, or using ad hoc or team provisioning profiles.
While this post uses DVIA as an example, you can apply the same process to any iOS app you want to test. After you’ve familiarized yourself with the process, you will know what to ask your developers for and can share these instructions with them to make interactions between your teams more efficient.
Overview of iOS app signing
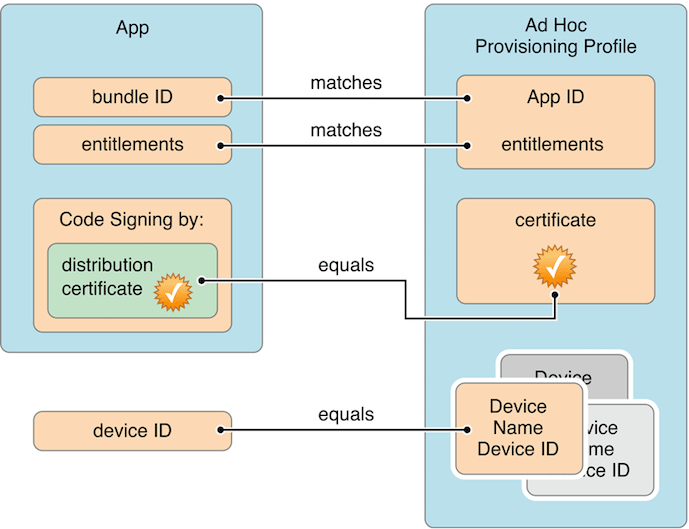
To install an iOS app on a physical device, you need to sign the app with a personal team, developer, or enterprise certificate provided by Apple and properly configure a provisioning profile for the device. Provisioning makes it possible for testers to launch the app on a device.
The provisioning profile links your certificate with your app’s unique ID. The profile also allows the device and Apple to verify the app and its entitlements and ensure that the specific device is valid and authorized.
This diagram below from the Apple App Distribution Guide illustrates the process:
I recommend reading Apple documentation on exporting your app for testing if you need more in-depth information about this topic.
Exporting an iOS app
The following are the three primary techniques for exporting an iOS app:
- Using Xcode to export an app with a personal team certificate and the xcodebuild command-line tool provided by Apple
- Using Xcode to export an app with a developer or enterprise account and iOS ad hoc distribution
- Third-party SaaS products and command-line tools, such as:
- Xcbuild from Facebook
- BuddyBuild
- Jenkins
- Travis
This post will provide instructions for the first two methods. I plan to write more extensively about third-party tools and how to incorporate them into the mobile app build cycle and continuous integration (CI) practices in future posts.
Using Xcode to export an app
If you do not already have a mobile app you can use as you follow along with this post, follow the instructions in the first article in this series about compiling DVIA for iOS 10 and Xcode 8. The remainder of these instructions use the DVIA app as an example to demonstrate how to export a specific app for mobile security testing, but the same process applies to any app.
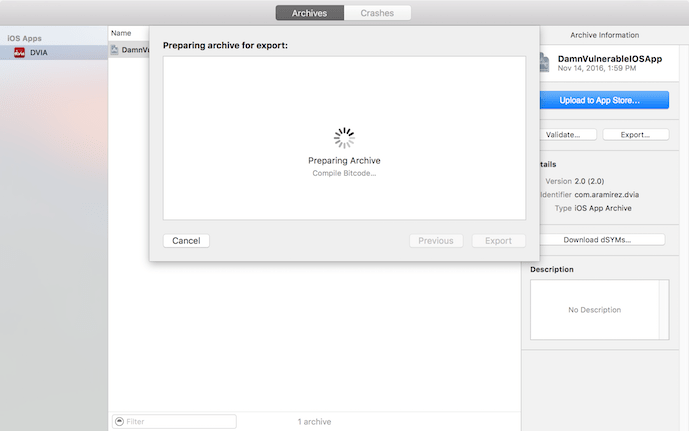
The first step in exporting an iOS app is the same whether you’re using a personal team or developer certificate. You will start by building an archive of the app in Xcode, which will validate the build and result in an .xcarchive file.
Building the archive
- Select Generic iOS Device from the Xcode project editor to archive the app properly
- Select Archive from the Product menu
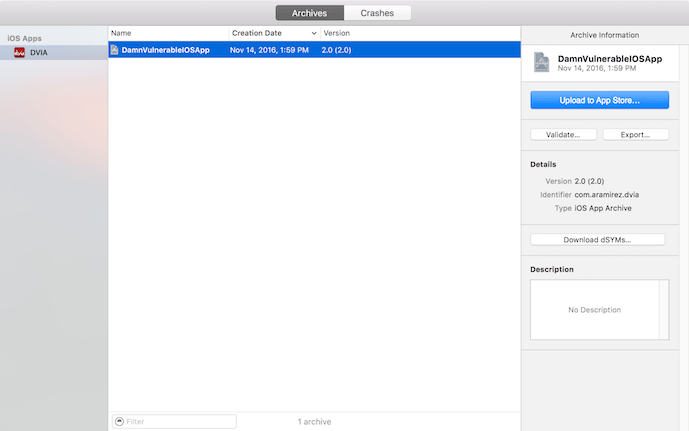
- The Xcode Organizer window appears showing current and previous archives of your app, and a DVIA Xcode archive file is now available (HINT: Open the Organizer window at any time by selecting Organizer from the Window menu).
From here, I’ll explain two different ways of creating an .ipa from an .xcarchive file. If you have a developer account/development certificate and followed the instructions in the first blog post in this series, continue on to the next section titled “Using iOS ad hoc distribution: From .xcarchive to .ipa with a development certificate.”
If you don’t have a developer account and are using a personal team certificate, skip to the section “From .xcarchive to .ipa with a personal team certificate.”
Using iOS ad hoc distribution: From .xcarchive to .ipa with a development certificate
If you have an Apple Developer account, you can use Xcode to directly export a .ipa by following the steps below (but let’s agree that command line is a whole lot more fun!).
- Click Export within the Archive Information menu in the right margin.
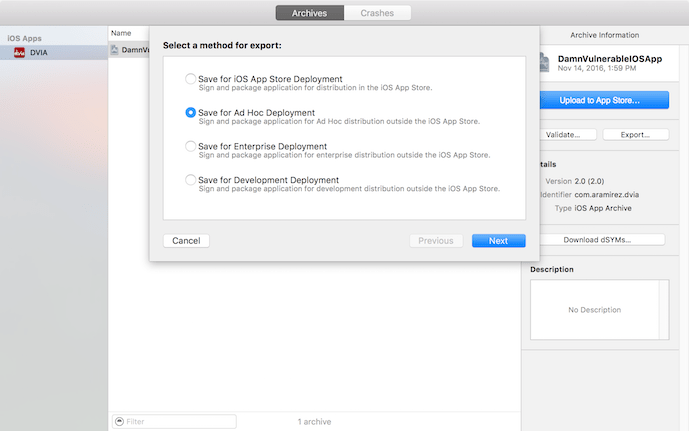
- Select Save for Ad Hoc Deployment, and then click Next.
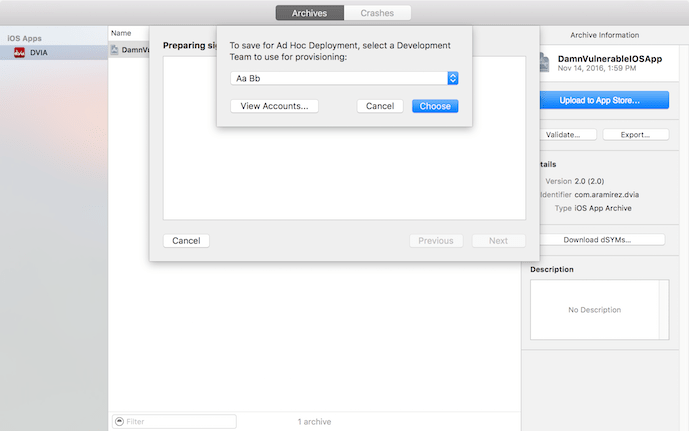
- In the drop-down menu, select your development team/account, and then click Next.
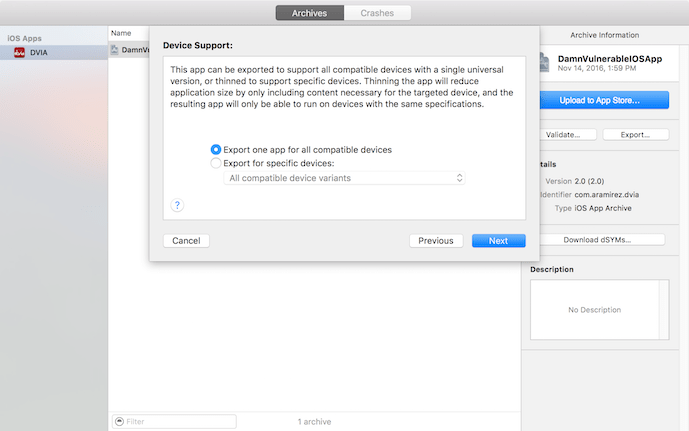
- Select Export one app for all compatible devices in the Device Support menu and click Next.
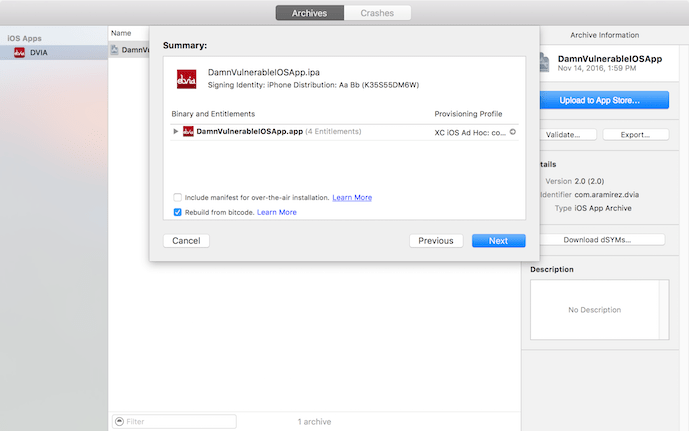
- When the Summary window appears explaining the process about to be performed, click Next.
- The app will begin to archive for export. Note that the exporting process can take some time.
- Once the app is archived for export, Xcode will ask you where you want to save the the archive.
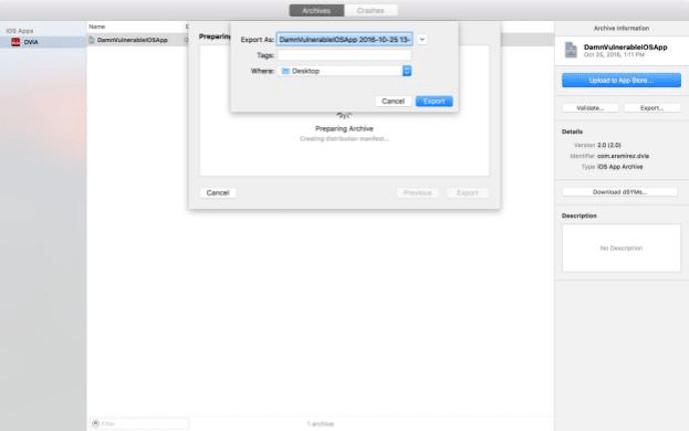
And with that, congratulations — you’re done! The exported file will contain an .ipa file you can submit to your security team, or upload yourself to an automated mobile app security testing solution.
From .xcarchive to .ipa with a personal team certificate
If you don’t have a developer account and use a free personal team certificate from Apple to sign your app, you will not be able to export the app from Xcode directly. You can, however, use Xcode’s command-line interface (xcodebuild) to generate an .ipa file from the .xcarchive file.
To do so, follow these steps:
- Right-click on the newly created archive file and select Show In Finder
- Run the following command from your terminal app:
xcodebuild -exportArchive -exportFormat ipa -archivePath /path/to/DVIA.xcarchive -exportPath ~/Desktop/DVIA-personal-team.ipa
Once the process completes, you should see the following results:
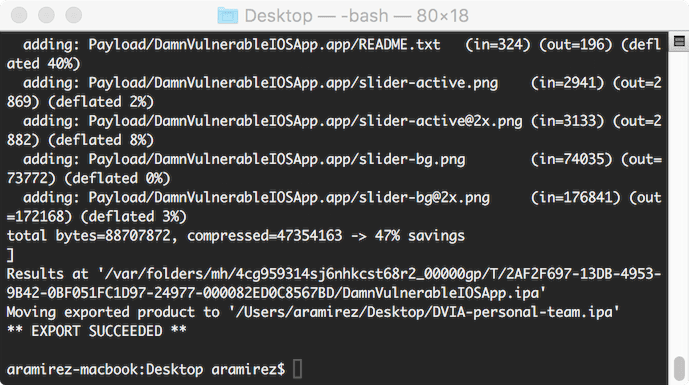
(HINT: If you drag the .xcarchive file from your Finder window into your terminal app, the full path to the file will auto-complete for you.)
Without a developer account, you can only export an .ipa file that will allow you to perform a limited set of security tests that don’t require an actual physical device. To perform tests that do require a physical device, the app will need to be re-signed. Many mobile app security testing tools (e.g., NowSecure Lab Automated) will do this for you to facilitate testing via a device farm.
Take away
Those of you following along at home have now compiled an iOS app (DVIA) and exported it for security testing — so go forth and security test! The next article in this series will explain how to write an automation script to perform automated security testing of DVIA on actual physical devices via device farms or automated testing solutions such as NowSecure Lab Automated.