
If you’ve ever tried to compile Damn Vulnerable iOS App (DVIA) for iOS 10 using Xcode 8 for mobile app security testing, you’ve probably felt one of the following ways: clueless, stupid, frustrated, angry-as-hell, or some combination of these. First, you’re not alone. DVIA (website | GitHub repository) is a special sort of app, and you can run into any number of discouraging obstacles trying to compile it for testing. Second, this blog post is the first in a series that will teach you how to avoid those hurdles and compile DVIA for iOS 10 and Xcode 8 for the purposes of mobile app security testing.
What is DVIA and for what is it used?
Security researcher Prateek Gianchandani (@prateekg147) developed and maintains DVIA, an iOS app that is damn vulnerable. Security researchers and security analysts can use DVIA as a sample iOS app with which they can learn to perform penetration testing and build their skills.
Occasionally people will also use DVIA as a sample app for evaluating mobile app security technology. I wanted to run DVIA through our automated mobile app security testing solution, which is why compiling DVIA for the latest versions of iOS and Xcode piqued my interest.
A note on DVIA and automated testing
Individuals use this app to learn how to perform penetration testing on an iOS app. Unlike most apps you find in the App Store, user experience and developer conventions (such as consistent labeling of UI elements) were not the primary focus. As such, without specific user interactions (which are harder to automate without consistent accessibility tags), the security flaws will not present themselves in automated testing.
However, this is a popular app for mobile app security analysts, and I wanted to demonstrate how to test this application with NowSecure Lab Automated, which automates static and dynamic mobile app security analysis of iOS and Android apps.
This blog post is part of a three-post series that will explain how to:
- Compile DVIA for the latest version of iOS (the topic of this article)
- Export DVIA for testing
- Write an automation script for exercising DVIA (coming soon)
System requirements
To run DVIA in the iOS Simulator:
To run DVIA on a physical device (as opposed to an emulator):
- Apple developer account ($99/year)
- iOS device registered on the Apple Developer account (you can grab its UDID via the Window menu in Xcode under Devices and then Identifier)
How to compile DVIA for iOS 10 and Xcode 8, step-by-step
1. Download the source code
mkdir ~/git
cd ~/git
git clone https://github.com/prateek147/DVIA.git
If you don’t have git installed, you can download an archive of the project with the following commands:
mkdir ~/git
cd ~/git
curl -L https://github.com/prateek147/DVIA/archive/master.zip | tar zx
mv DVIA-master DVIA
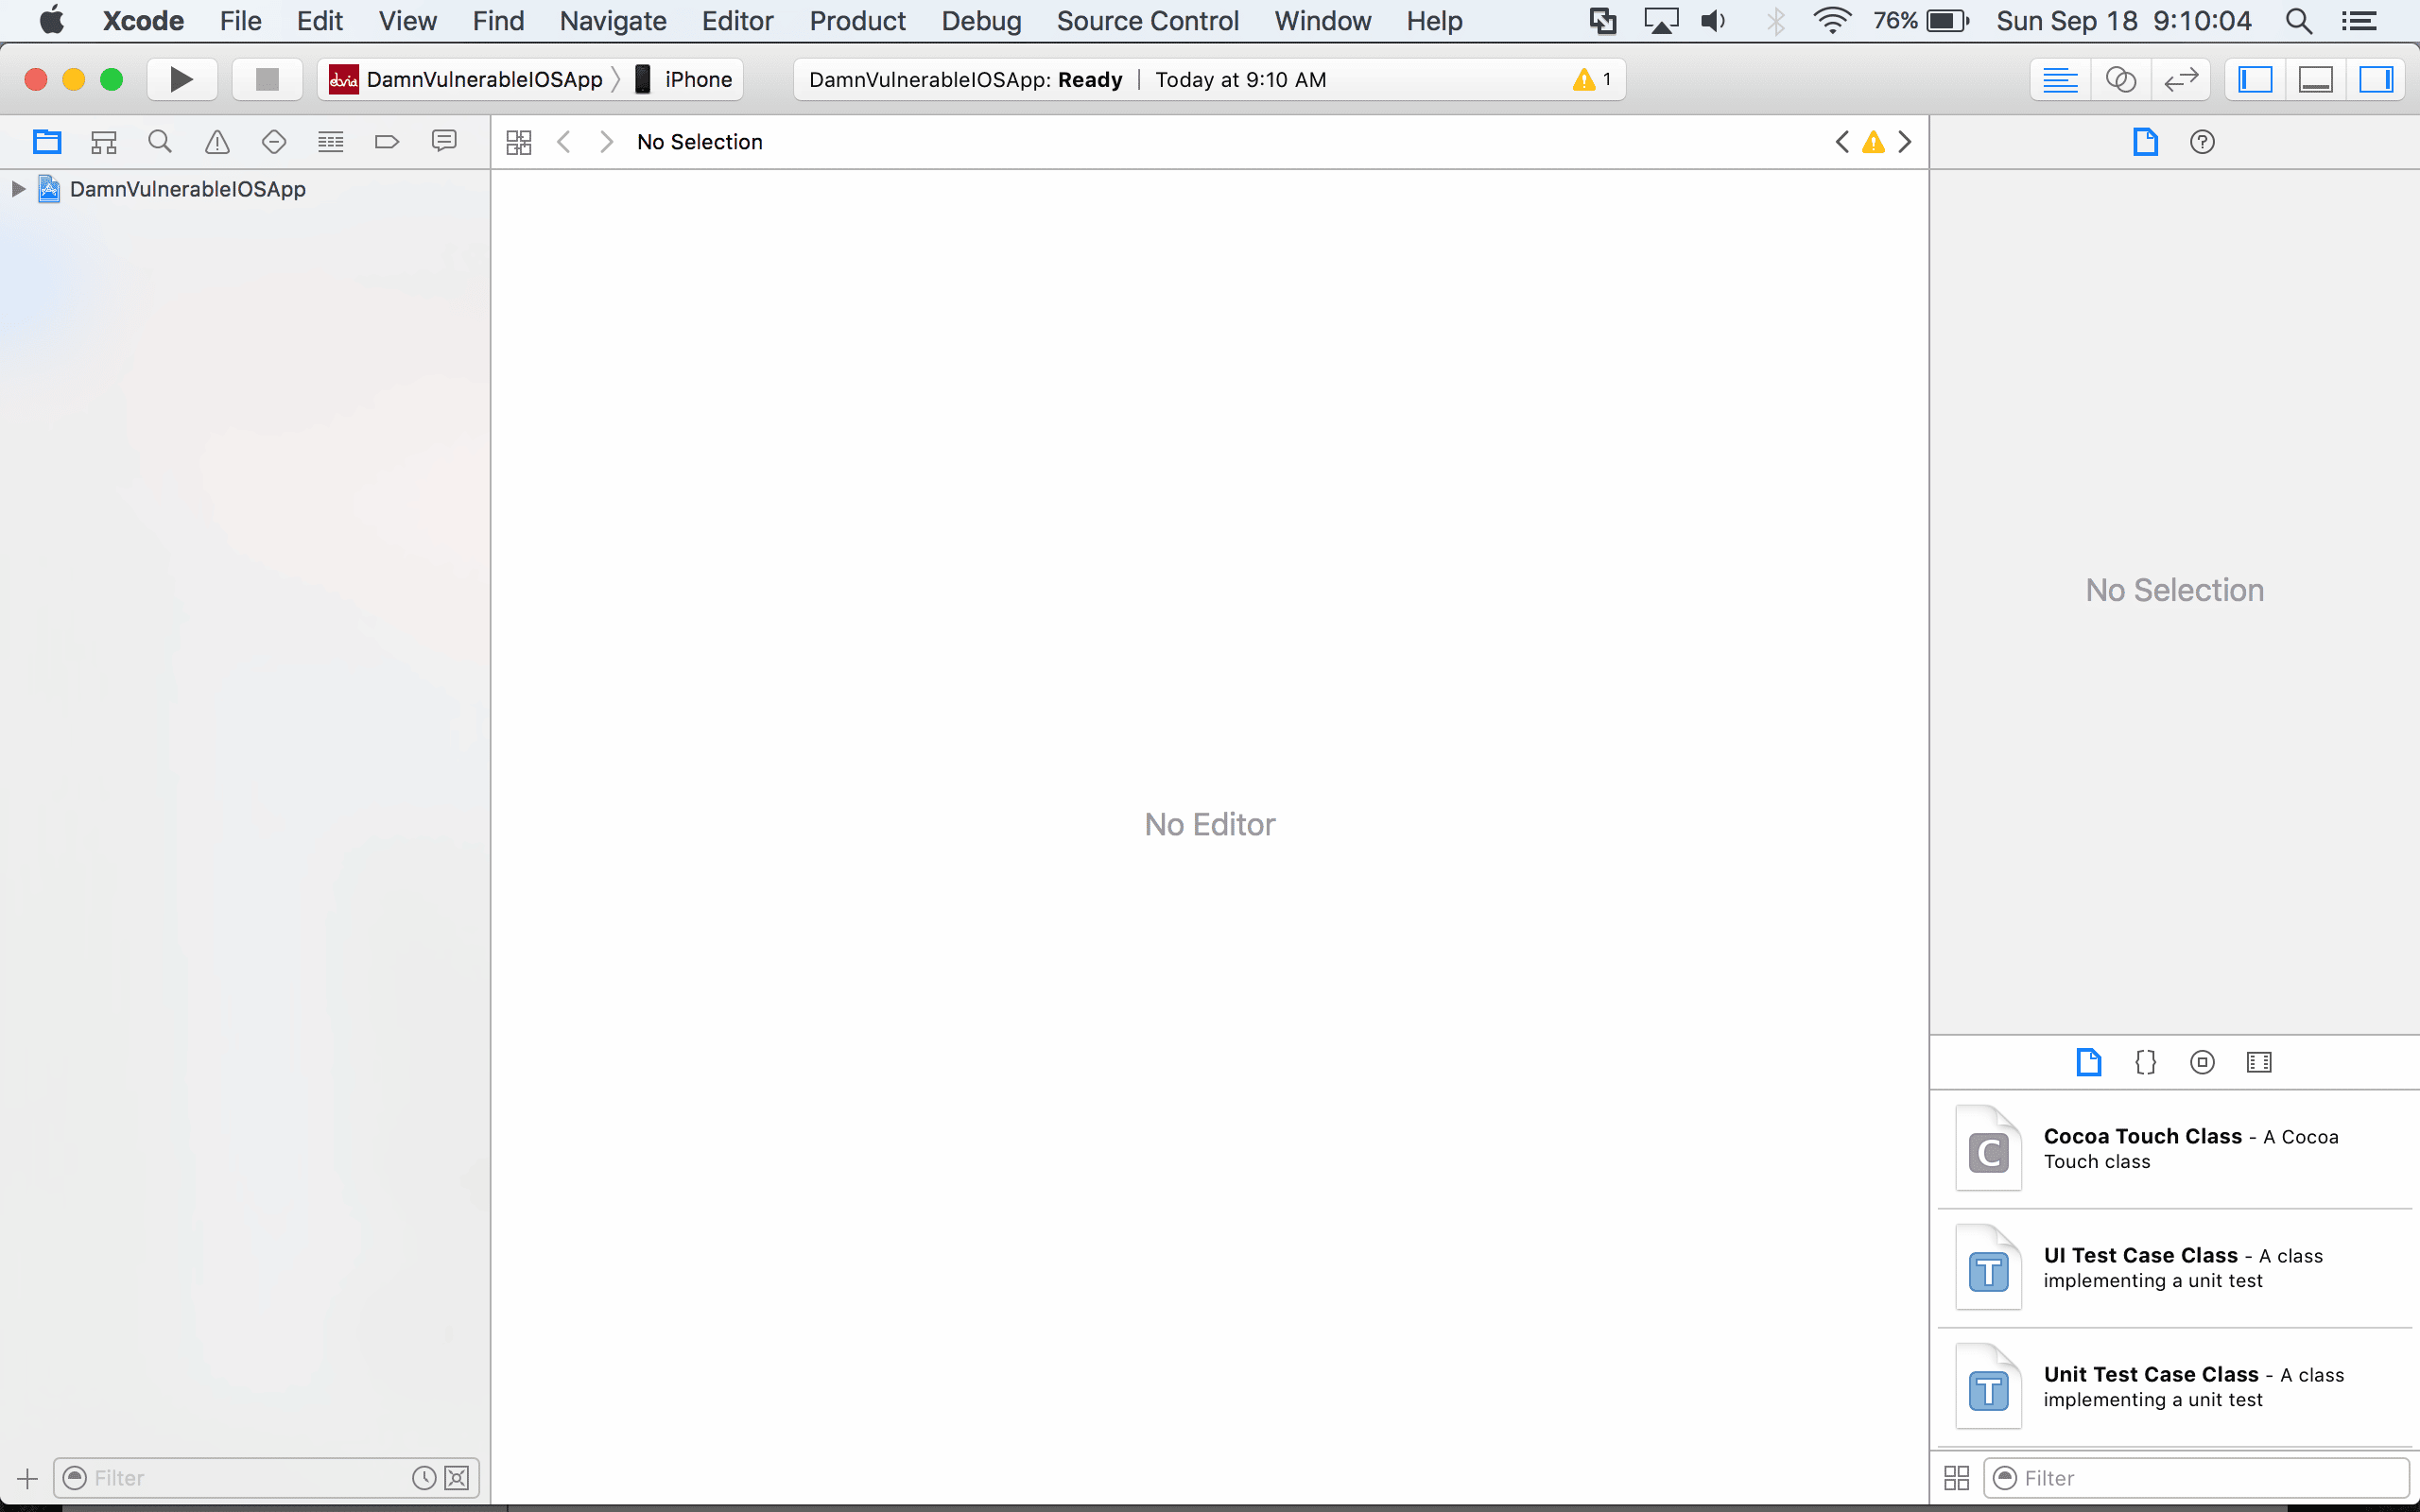
2. Launch Xcode and open the workspace
cd ~/git/DVIA/DVIA/DamnVulnerableIOSApp
open DamnVulnerableIOSApp.xcworkspace
We open the workspace instead of the project because the app will use CocoaPods.
3. Disable App Transport Security (ATS)
Apple released a new feature in iOS 9 called App Transport Security (ATS) which secures user data by enforcing HTTPS connections between apps and web services.
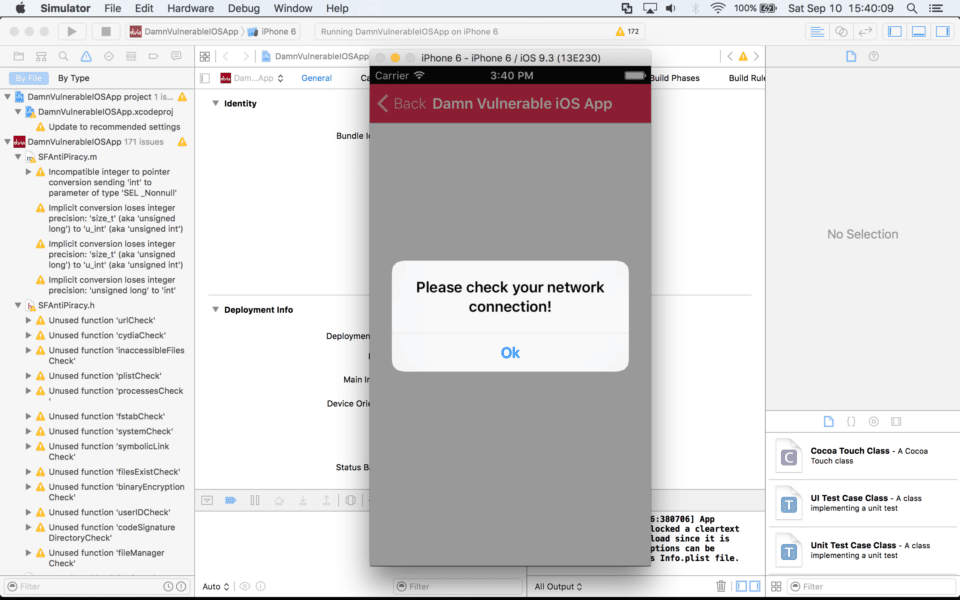
Since DVIA was developed several years ago with the explicit goal of including vulnerabilities, it makes extensive use of HTTP connections. Apple enabled ATS by default in Xcode and iOS 9 and above, and so when you run the app you’ll receive the follow error (viewable in the debug console for the simulator):
2016-09-10 15:37:04.340 DamnVulnerableIOSApp[4814:378583] App Transport Security has blocked a cleartext HTTP (http://) resource load since it is insecure. Temporary exceptions can be configured via your app's Info.plist file.
For more information about implementing ATS, see our secure mobile development best practice 6.5 “Implement App Transport Security (ATS).”
Since the goal of DVIA is to expose security flaws, you will need to disable ATS in the app. To do that, we’ll edit the plist file and add the appropriate configuration. I referenced the article “How to use custom Info.plist XML to support iOS 9’s new App Transport Security feature” for this step.
vim DamnVulnerableIOSApp/DamnVulnerableIOSApp-Info.plist
Go to the bottom of the file and insert the following text above the last “</dict>” tag:
<key>NSAppTransportSecurity</key>
<dict>
  <key>NSAllowsArbitraryLoads</key><true/>
</dict>
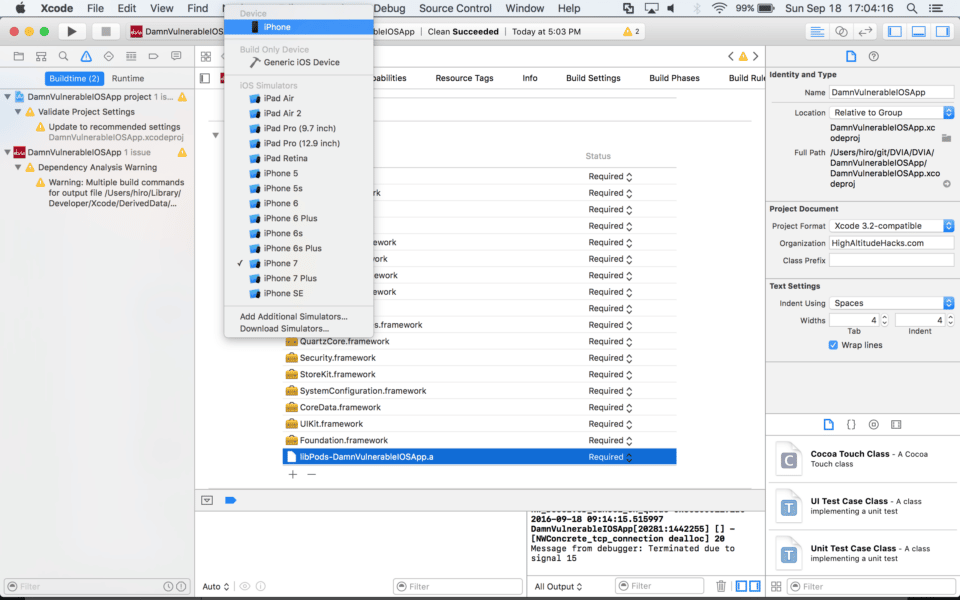
4. Configure the app and device (simulator or physical device) within Xcode
Simulator
If you decide to use the simulator: select iPhone 7 (note that larger iPhone 7 Plus models won’t fit on a 12″ Macbook screen!), click Run, and you’re done.
Physical device
On the Project menu, select DamnVulnerableIOSApp.

For each target:
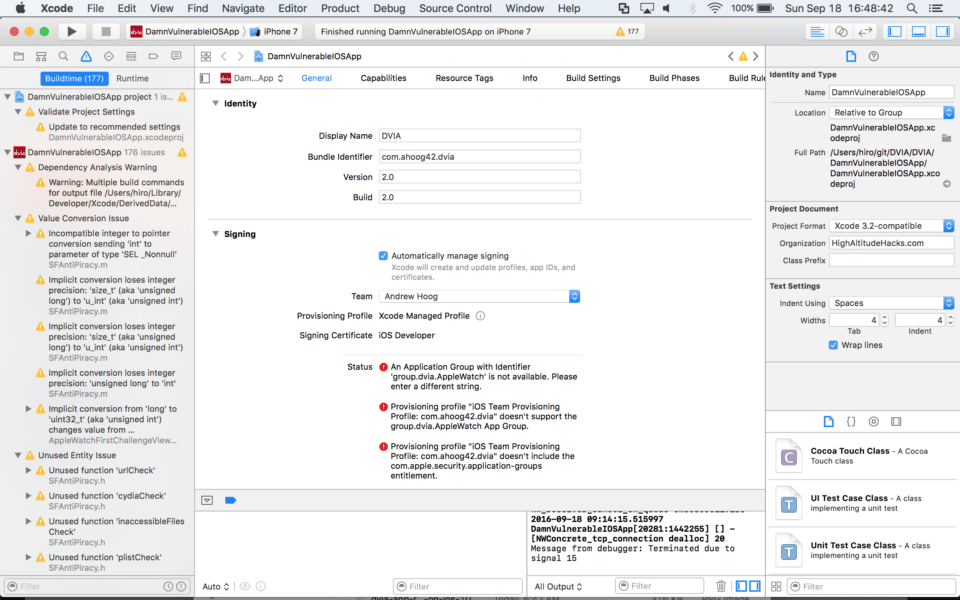
- Change the Bundle Identifier to an appropriate name
- I chose com.ahoog42 because it corresponds with the e-mail address I used to create my developer account
- It’s best to chose a bundle identifier name that corresponds with your developer account because you can’t use an already registered name
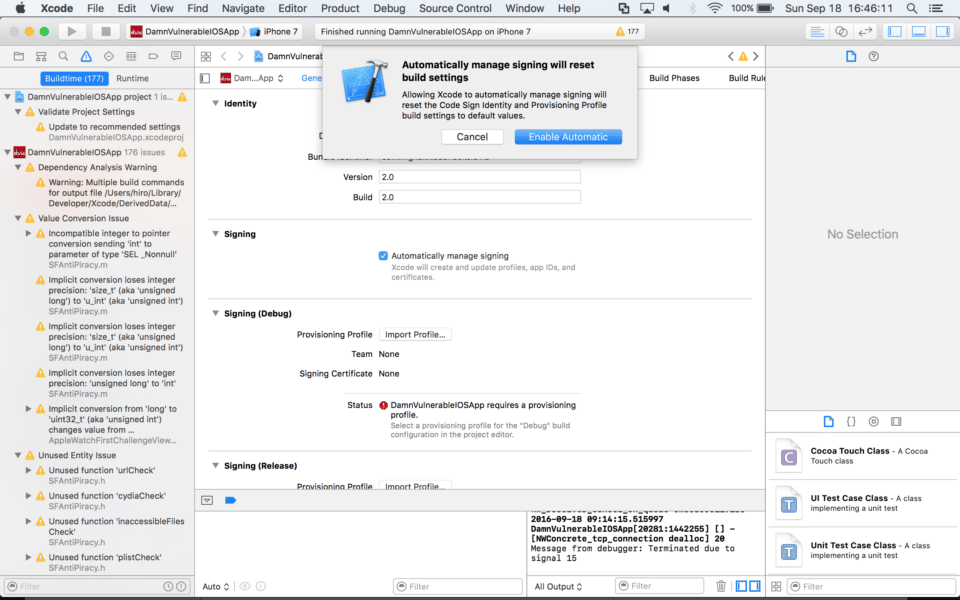
- Under the Signing heading, select “Automatically manage signing,” and then confirm by selecting “Enable Automatic”
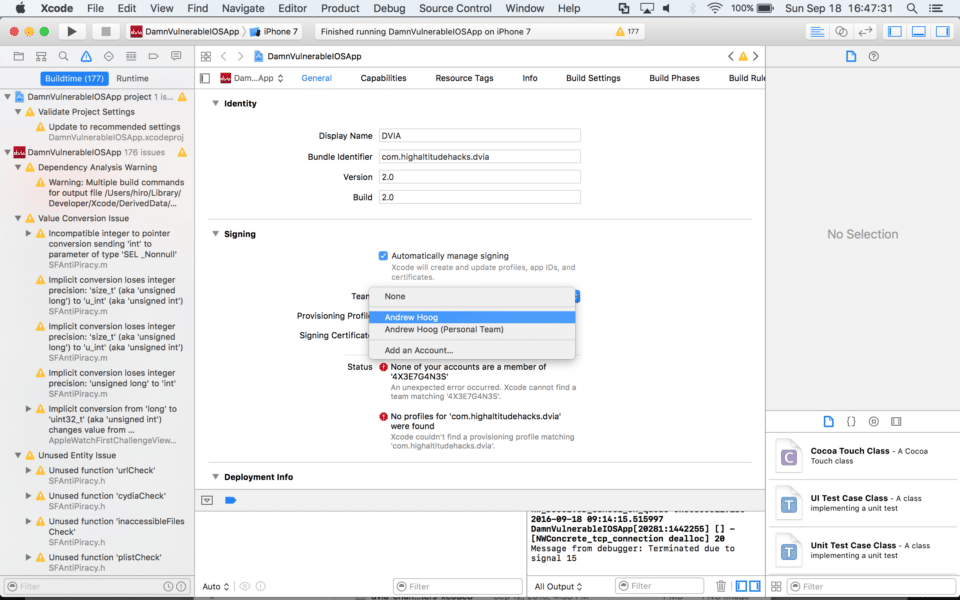
- Under Signing and in the Team field, select your developer account from the drop-down menu.
- Repeat the steps above for the WatchKit Extension
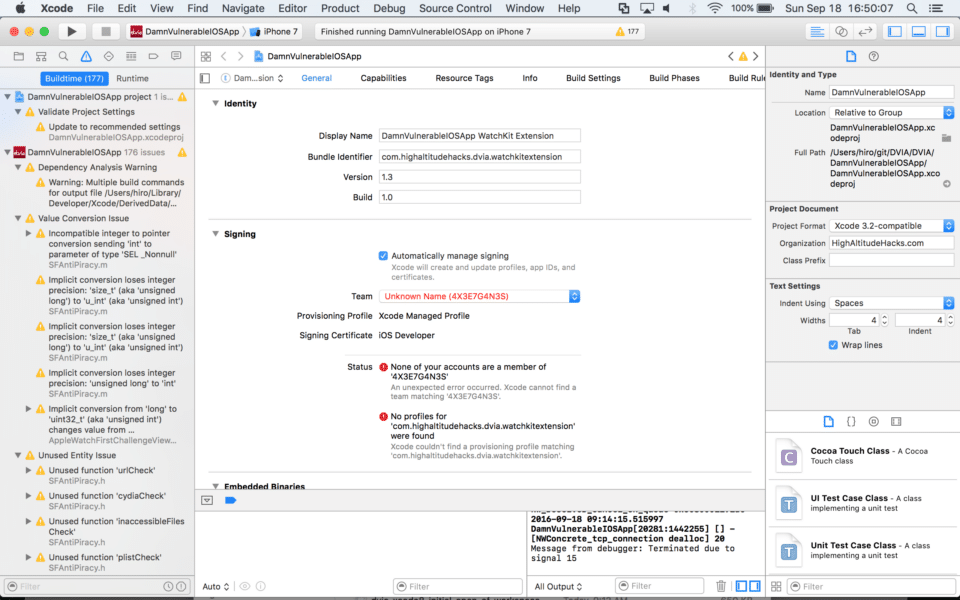
- At this point, Xcode will complain about a number of errors, but we’ll take care of those shortly.
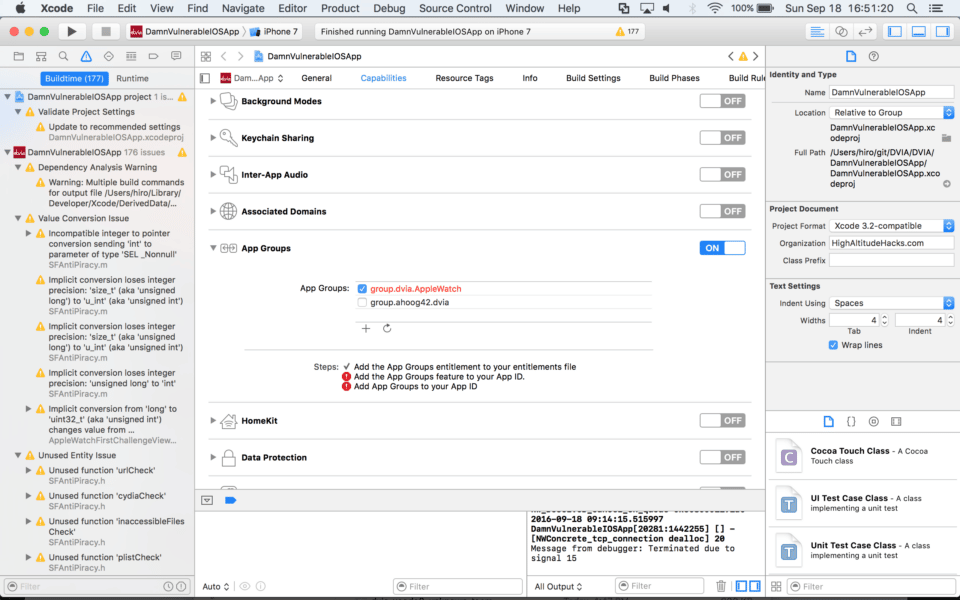
6. Deselect the AppleWatch app group and select your app group
Go to the Capabilities menu and under the App Groups section do the following:
- Uncheck group.dvia.AppleWatch
- Add your app group (group.ahoog42.dvia in my example)
7. Update WatchKit Extension Info.plist
vim DamnVulnerableIOSApp WatchKit Extension/Info.plist
Change WKAppBundleIdentifier from “com.highaltitudehacks” to your group identifier (in this case, I used “com.ahoog42”) .
      <key>WKAppBundleIdentifier</key>
      <string>com.ahoog42.dvia.watchkitapp</string>
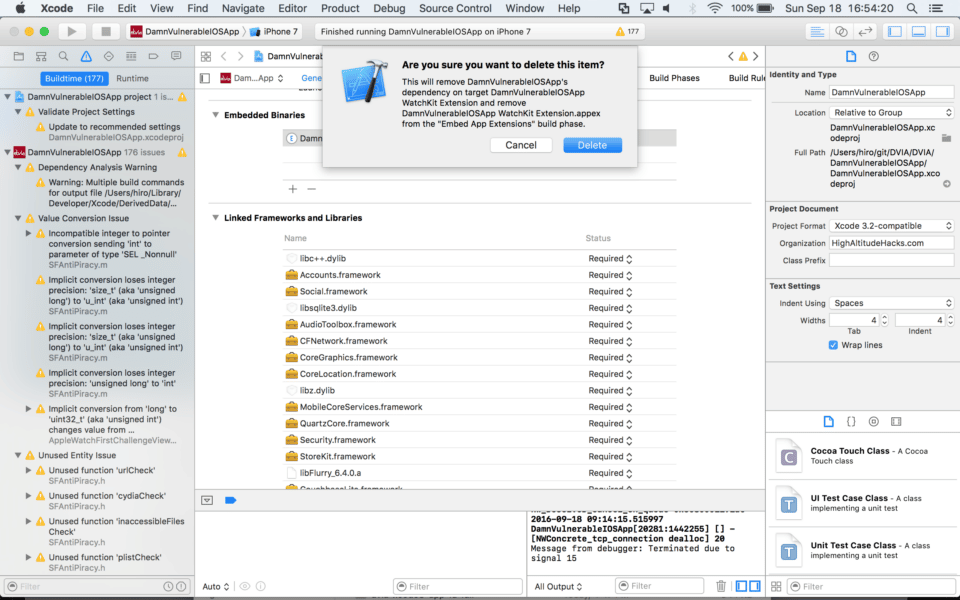
8. Remove WatchKit binaries
Next, we’re going to remove the WatchKit binaries from the app using the General tab and selecting the extension under Embedded Binaries, and then clicking the “–” button:

Xcode will ask you whether you really want to do this. Simply click Delete.
9. Install CocoaPods
CocoaPods manages third-party libraries and frameworks used in your Xcode project. For example, CocoaPods automatically updates the libraries and frameworks used in your project and makes it easy to revert back to earlier versions. In order to install CocoaPods, you will need to properly configure and setup Ruby and update it for your current user.
If you don’t have Ruby and RubyGems properly installed, you will get the following error:
$ gem install cocoapods
Fetching: i18n-0.7.0.gem (100%)
ERROR:  While executing gem ... (Gem::FilePermissionError)
    You don't have write permissions for the /Library/Ruby/Gems/2.0.0 directory.
To take care of this error, see the article “Install Ruby on Rails 5.0 – macOS Sierra” from the RailsApps Project.
Once you have Ruby and RubyGems installed, install CocoaPods as follows:
gem install cocoapods

cd ~/git/DVIA/DVIA/DamnVulnerableIOSApp
pod init
vim Podfile
This will allow you to modify the Podfile where you should add the following:
  # Pods for DamnVulnerableIOSApp
  pod 'Parse'
  pod 'GoogleAnalytics'
  pod 'Realm'
  pod 'couchbase-lite-ios'
  pod 'Flurry-iOS-SDK/FlurrySDK'
10. Install selected pods
Exit the Xcode project and run:
pod install
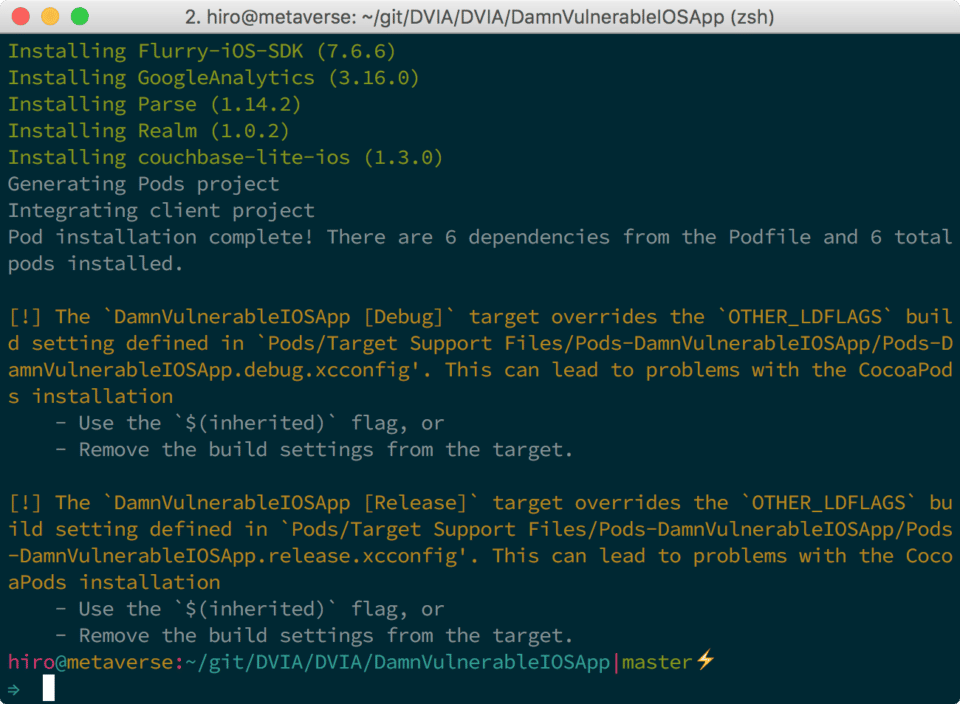
After you complete the install of the CocoaPods dependencies, you’ll receive the following warning message:
Pod installation complete! There are 6 dependencies from the Podfile and 6 total
pods installed.

[!] The `DamnVulnerableIOSApp [Debug]` target overrides the `OTHER_LDFLAGS` build setting defined in `Pods/Target Support Files/Pods-DamnVulnerableIOSApp/Pods-DamnVulnerableIOSApp.debug.xcconfig'. This can lead to problems with the CocoaPods installation
    - Use the `$(inherited)` flag, or
    - Remove the build settings from the target.

[!] The `DamnVulnerableIOSApp [Release]` target overrides the `OTHER_LDFLAGS` build setting defined in `Pods/Target Support Files/Pods-DamnVulnerableIOSApp/Pods-DamnVulnerableIOSApp.release.xcconfig'. This can lead to problems with the CocoaPods installation
    - Use the `$(inherited)` flag, or
    - Remove the build settings from the target.
11. Replace linker flags
Open the Xcode project DamnVulnerableIOSApp.xcworkspace/.
Remove the -ObjC compiled flag from the iOS app:
- Select the DamnVulnerableIOSApp target
- Go the Build Settings tab
- Under the Linking heading, double-click “Other Linker Flags”
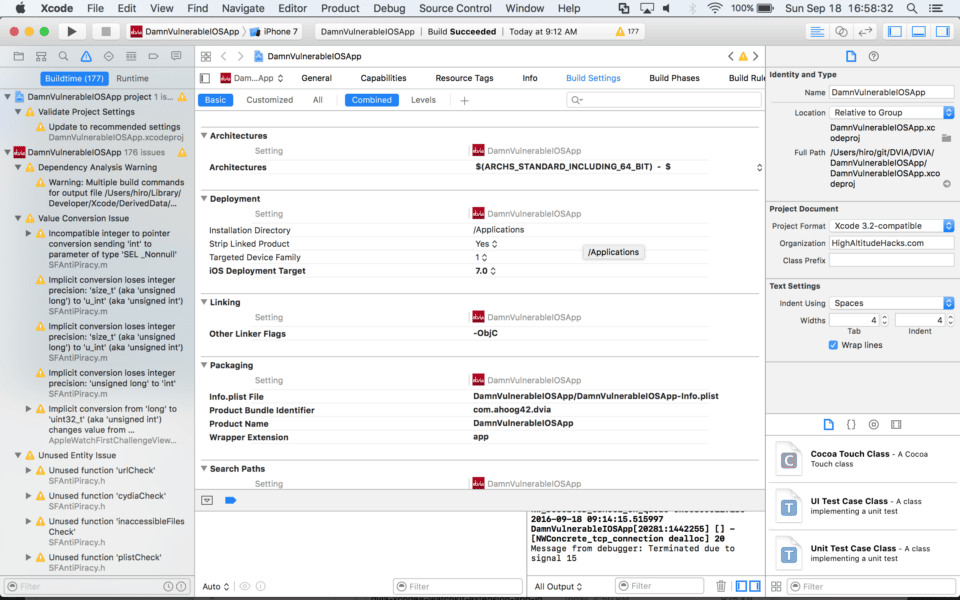
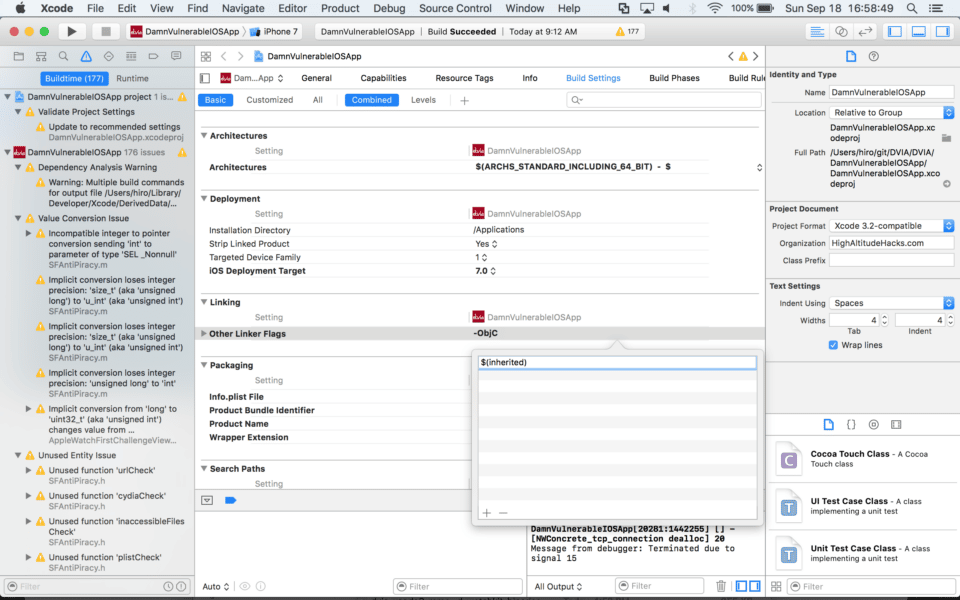
- Remove -ObjC
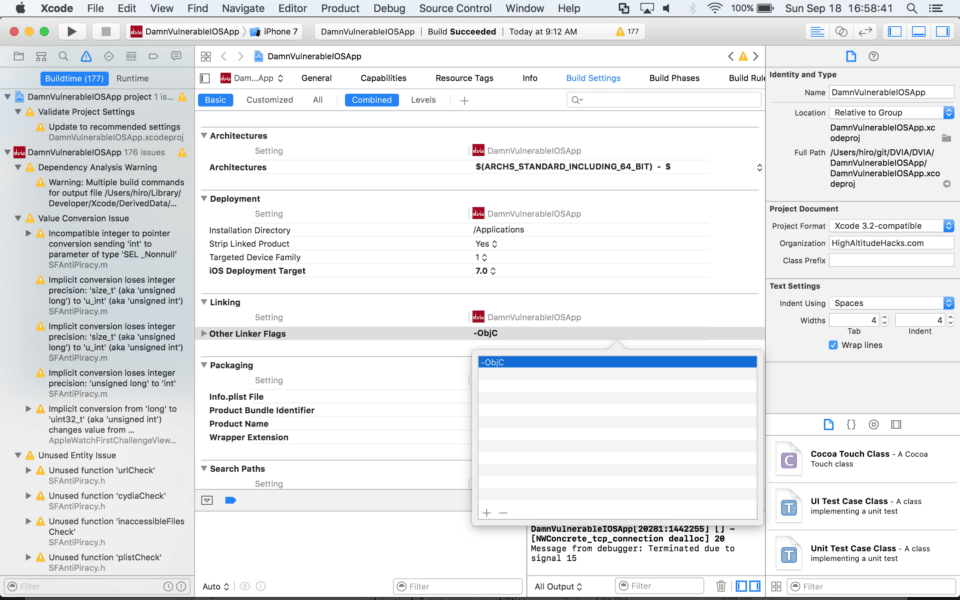
- Add $(inherited)
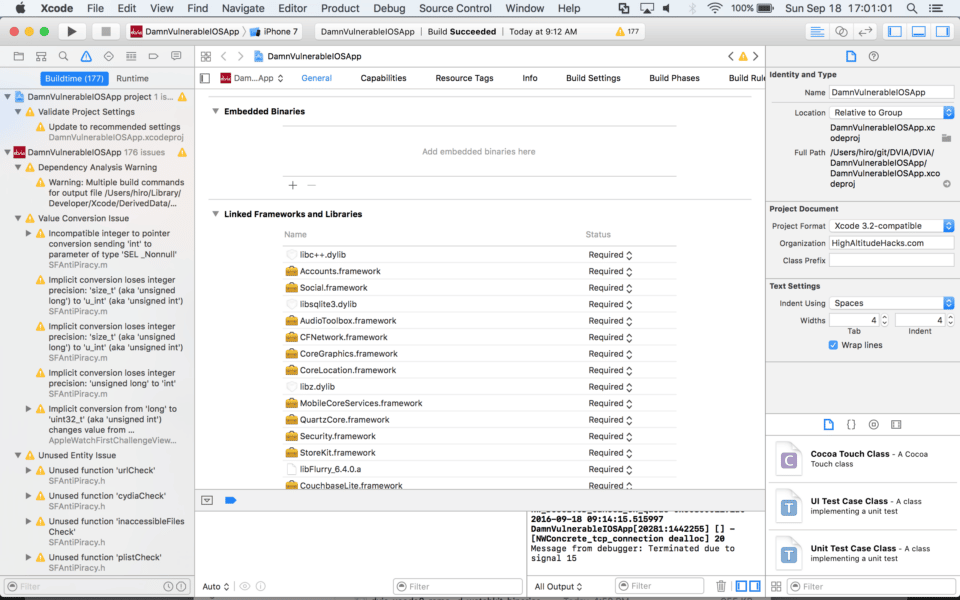
12. Remove unneeded frameworks
On the General tab, under Linked Frameworks and Libraries, remove all of the following libraries now included by CocoaPods by selecting each library and hitting the delete key on your keyboard:
- libFlurry_6.4.0.a
- CouchbaseLite.framework
- Parse.framework
- libGoogleAnalyticsServices.a
- Realm.framework
13. Add your device’s UDID to your developer account
Adding your Device’s UDID to your developer account will allow you to run the app on a physical device. Your device can be registered through the Devices menu under Certificates, IDs & Profiles on your Apple Developer account.
For more details, see the article “Maintaining Identifiers, Devices, and Profiles” on the Apple Developer website.
14. Compile and install DVIA
Go to the Product menu and click on Clean to clean out the build folder and prepare for compiling.
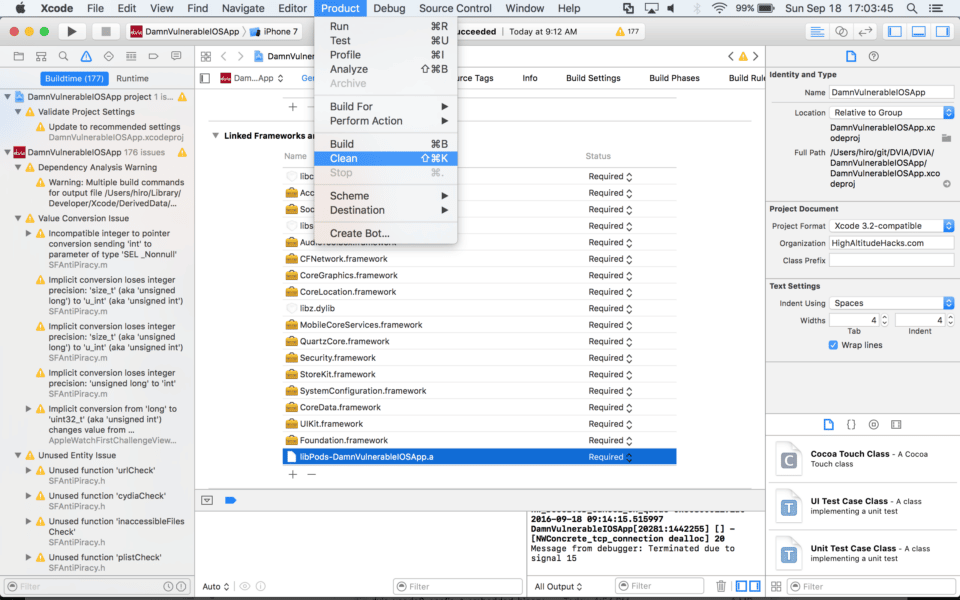
Now you’re ready to compile DVIA for iOS 10 and Xcode 8. Just select the device, click the play button to compile, install DVIA, and you’re done!
Take away
Now you’ve compiled DVIA for Xcode 8 and iOS 10, and with that you can now install DVIA on your iOS device and perform security tests. The next article in this series will teach you to export DVIA for uploading to device farms, and the third post will explain how to write an automation script to perform automated testing of DVIA via device farms.