


Introduction
One of the biggest players in mobile, Apple, has based each of its devices on one main operating system. Known simply as”iOS,” Apple’s popular mobile operating system runs on its flagship mobile devices, including the iPhone and iPad.
iOS is a closed source platform. This means that the source code of iOS is not shared publicly for anyone to view or make changes to. Closed source does not mean, however, that we cannot view specific pieces of the iOS structure – particularly the kernel, which is based on free, open sourced software. As will be discussed below, obtaining the F/OSS software that these pieces are built on and combining some professional software will allow us to gain great insight into the iOS kernel. This article will show you step by step how to obtain, decrypt and extract a binary version of the iOS kernel with the help of Santoku-Linux 0.4.
Santoku is a free, open-sourced OS which is focused on mobile forensics, mobile malware analysis, and mobile security. It can be downloaded from https://santoku-linux.com/download.
Why the kernel?
The interest in looking at the iOS kernel can be justified by different reasons. For example, we may want to look at the code signing verification portion of the kernel to determine how it works and how it is implemented. Vulnerability research in this iOS specific part of the kernel which we likely would not entirely find in the XNU open source tree may provide us insight into this part of iOS and its kernel.
What you need
If you are interested into following the article step by step, you will need:
- A working installation of Santoku Linux 0.4
- An iOS device (optional)
- Some tools that you will find while reading the article
- IDA Pro (optional, but highly recommended when working with iOS kernel. Also the ïHex Rays’ plugin is optional to decompile ARM 32-bit code)
The iOS kernel is based on the XNU kernel. This kernel is open source. Apple made some modifications to the open source version before deploying to iOS which makes it necessary to get your on a binary version of the kernel running on the devices before you’ll be able to view the kernel in the depth that we’ll discuss today. Once you have a binary version of the kernel, you’ll need to use some reverse engineering tools like IDA Pro to complete your analysis.
In order to reverse or look at the iOS specific changes, we will face some unique challenges that we don’t have on the Android platform. Often on the Android platform, the kernel source of a device can be found with relative ease. On iOS, however, this is not the case. Therefore, in order to understand and study those specific changes, we are forced to reverse engineer some part of the kernel from the binary. In this example, we will use tools such as IDA Pro.
The goal of this article is to guide you through the first steps of this process.
On iOS instead of finding a standalone kernel, we will find a”kernelcache”. The kernelcache is essentially a container for the kernel itself and all the extensions (kexts for the ones familiar with OS X), packed together.
Hands On
Let’s get started. In the first part of the article we will assume that you are running on a brand new Santoku Linux 0.4, so we can follow together. You will be able to use also other Linux distributions if you fulfill the dependencies by yourself.
To be sure that the system is up to date in a terminal we update the system:
sudo apt-get update sudo apt-get dist-upgrade Confirm the operations and eventually reboot if a new kernel is installed. To extract the kernel cache we can extract and decrypt from our phone, or extract and decrypt a .ipsw. An ipsw file is an archive (as we will see later this is essentially a zip) containing the firmware and updates for the device. In order to find where to download our target IPSW, we have multiple choices:
- http://www.itunes.com/version
- the iphone wiki firmware page
In this example we choose to extract a ipsw of iOS 7.0.2 for the iPhone 4, downloadable from Apple here: http://appldnld.apple.com/iOS7/091-9871.20130924.7imYu/iPhone3,1_7.0.2_11A501_Restore.ipsw
Next, in the terminal we do:
wget http://appldnld.apple.com/iOS7/091-9871.20130924.7imYu/iPhone3,1_7.0.2_11A501_Restore.ipsw It can take a while because they are around 900 MB. The ipsw can now be unzipped in the terminal with the unzip command.
unzip iPhone3,1_7.0.2_11A501_Restore.ipsw 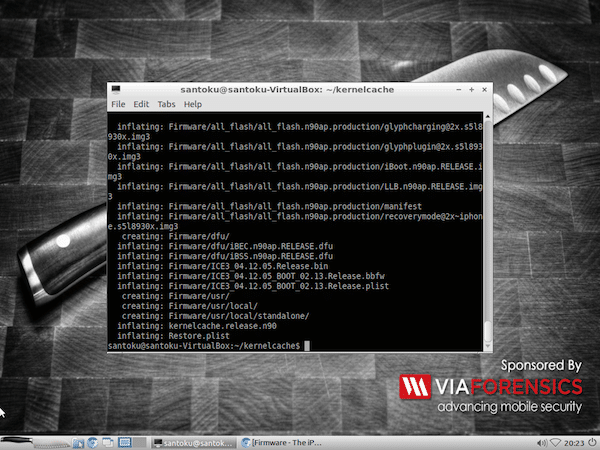
Unzip the IPSW in Santoku Linux
As we can see there is a file kernelcache.release.n90. We will decrypt this file with some freely available tools and analyze it in IDA Pro. To do this, we will need the xpwn and the lzssdec tools. First we install some dependencies and tools:
sudo apt-get install git build-essential libz-dev libbz2-dev libusb-dev cmake libpng12-dev You can now download the prebuilt binary for this guide (tested on Santoku 0.4 64bit) or compile it by yourself:
git clone https://github.com/planetbeing/xpwn.git cd xpwn/ ls 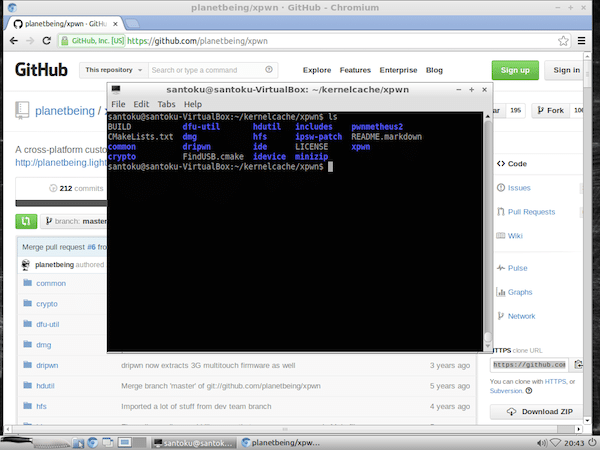
The xpwn tool folder
In the BUILD file we can find the instruction to build the tool, or just follow this guide:
mkdir build cd build cmake ../ make Now you will find xpwntool under the ipsw-patch subfolder:
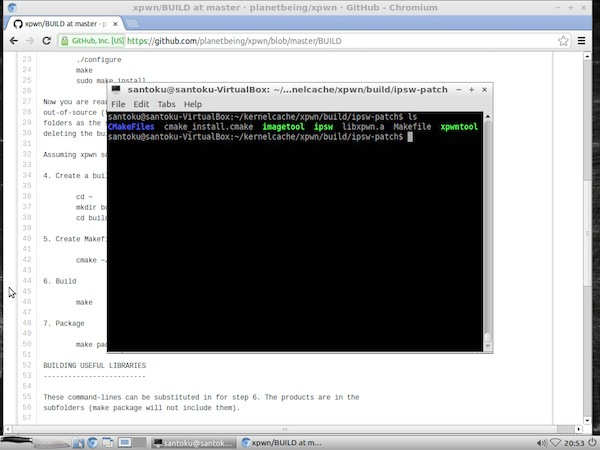
The xpwntool location
We can now copy the xpwntool into our working directory with our encrypted kernelcache. Now you need to find your IV and KEY for your particular type of device and file (kernelcache). They will not be listed in this guide but you can retrieve them from your jailbroken device (it’s device model, file, and ios version specific) or find it online for the kernelcache file.
You will also need the AES key and iv for the file. These are stored within the file encrypted with the device GID key. This GID key is in the hardware of the device and it is shared among the devices that ships with the same processor. You can find more details on The Iphone Wiki, where you can also find a working key and iv for the kernelcache depending on your device.
./xpwntool kernelcache.release.n90 kernelcache.decrypted -iv [MY_IV] -k [MY_KEY] -decrypt 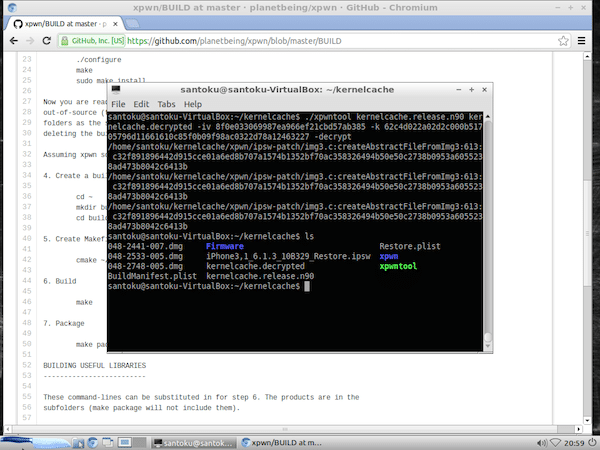
A list of the files with the decrypted kernelcache
To obtain a valid Mach-O executable to analyze in IDA Pro we will have to use another tool, lzssdec. You can download a compiled version from here or follow the guide and compile by yourself:
wget http://nah6.com/~itsme/cvs-xdadevtools/iphone/tools/lzssdec.cpp g++ lzssdec.cpp -o lzssdec 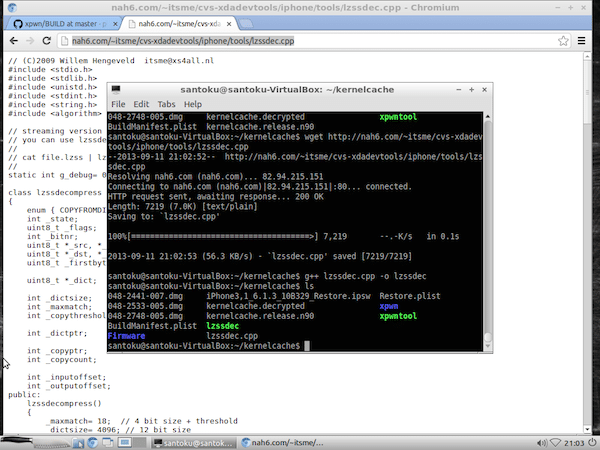
lzssdec compiled
Now we can run lzssdec on the decrypted image:
./lzssdec -o 448 < kernelcache.decrypted > kernelcache.mach.arm We can check the result with:
xdd kernelcache.mach.arm | head And see that the first bytes are:
0xfeedface 
View the results in Santoku-Linux
Using the file command:
file kernelcache.mach.arm Will return that the binary is a Mach-O executable for ARM if the procedure is done correctly.
It’s IDA Time!
Now we can take our kernelcache.mach.arm and throw it to IDA Pro 🙂 (Or you can use a disassembler of your choice, like Hopper http://www.hopperapp.com/. We will use IDA Pro on Windows with Hex Rays eventually). We open the kernelcache.mach.arm with IDA Pro (since IDA will recognize the Mach-O binary).
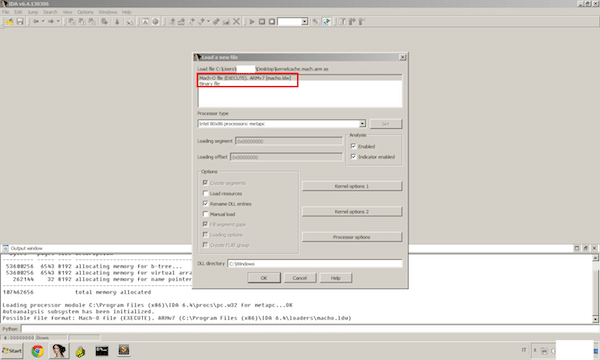
kernelcache.mach.arm in IDA Pro
We get asked if we want to split the kernel into the many KEXTs that are bundled inside (in iOS the kernel and the loadable kext extensions are all bundled into the kernelcache). Choosing yes and confirming the other windows to start the analysis.
Start the analysis in IDA Pro
Now we can take a cup of coffee because the auto analysis of IDA can take a while on the kernel.

Unexplored areas in the IDA Pro analysis
Notice all the areas unexplored by IDA, we will see that at the ends of the analysis IDA Pro will have a much clearer idea of what’s going on in the binary.
When the analysis is finished, we can save the database and eventually backup it. There is no undo for lot of actions in IDA Pro, so if you want to save your current state it’s better also to make a backup manually.
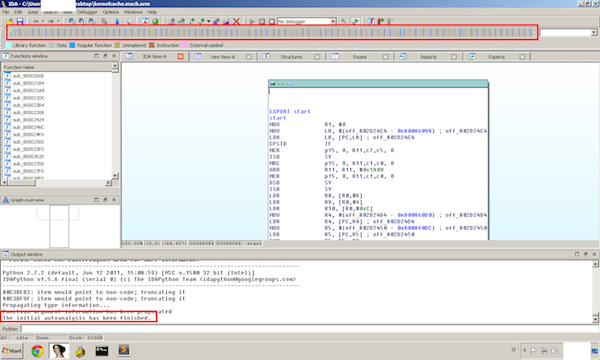
Analysis finished in IDA Pro
Now we can start reversing the iOS kernel and adjust the initial automatic analysis made by IDA Pro.
Sources
- xpwn git
- lzssdec source
- The phone wiki
- Mac OS X and iOS Internals: To the Apple’s Core
- iOS Hacker’s Handbook
Binaries
- lzssdec
- xpwntool