

In this post, I’ll explain how I solved the OWASP Mobile Security Testing Guide (MSTG) Crackme level 1 using Frida. Huge thanks to Bernhard Mueller for creating these crackmes and for encouraging people to create tutorials on how to beat them using open source tools. At the end, I’ll take the OWASP iOS crackme tutorial a bit further and show how I also beat the crackme using some tools here at NowSecure.
OWASP iOS crackme tutorial overview
To start, I download the app and re-sign it so I can install it to my test device. Since this tutorial is about dynamic analysis, I’ll use a live device and need to install Frida. Once I install the app, I run it, take a look at the UI, and start using my tools to solve the puzzle. Without some tools to look under the hood of the application, it’s nearly impossible to guess the answer and solve the crackme. That’s the point, dynamic analysis is a powerful tool for peeking under the hood of the app, and a powerful tool for both reverse engineering apps and performing application security testing. I’ll wrap up with a demonstration of how I can fully automate the solution of the crackme using UI automation with some really powerful tools that build on top of Frida.
Onward!
Download & Re-sign the app
You can grab the Crackme .ipa here.
You can follow the OWASP crackme instructions here, or use Cydia Impactor, iSign, etc.
I’m going to use our nowsecure/applesign tool which is essentially a wrapper around Apple’s `codesign` and related tools.
$ applesign ./UnCrackable_Level1.ipa -B -c -d --identity xxx --mobileprovision ~/.isign/Manual_iOS_Team_Provisioning_Profile.mobileprovision --output /tmp/resigned.ipa

Unzipping /Users/user/apple/ipa/crackmes/UnCrackable_Level1.ipa
Payload found
Main IPA executable is not encrypted
Embedding new mobileprovision
{"keychain-access-groups":["xxx.*"],"get-task-allow":true,"application-identifier":"xxx.*","com.apple.developer.team-identifier":"xxx"}
Cloning entitlements
Updated binary entitlements/Users/user/apple/ipa/crackmes/UnCrackable_Level1.ipa.eaf60e81-9162-4437-a954-438301932004/Payload/UnCrackable Level 1.app/UnCrackable Level 1.entitlements
Signing libraries and frameworks
Executable found at /Users/user/apple/ipa/crackmes/UnCrackable_Level1.ipa.eaf60e81-9162-4437-a954-438301932004/Payload/UnCrackable Level 1.app/UnCrackable Level 1
Resolving signing order using layered list
Signed /Users/user/apple/ipa/crackmes/UnCrackable_Level1.ipa.eaf60e81-9162-4437-a954-438301932004/Payload/UnCrackable Level 1.app/UnCrackable Level 1
Verifying /Users/user/apple/ipa/crackmes/UnCrackable_Level1.ipa.eaf60e81-9162-4437-a954-438301932004/Payload/UnCrackable Level 1.app/UnCrackable Level 1
Zipifying into /tmp/resigned.ipa ...
Cleaning up /Users/user/apple/ipa/crackmes/UnCrackable_Level1.ipa.eaf60e81-9162-4437-a954-438301932004
Target is now signed: /tmp/resigned.ipa
Using Applesign has the advantage of automatically enabling the `get-task-allow` entitlement for the re-signed app — which is useful for attaching a debugger for example.
Now that I have a re-signed version of the .ipa, I can install it on the device — I’ll use the libimobiledevice tools for this.
$ ideviceinstaller -i /tmp/resigned.ipa
WARNING: could not locate iTunesMetadata.plist in archive!
WARNING: could not locate Payload/UnCrackable Level 1.app/SC_Info/UnCrackable Level 1.sinf in archive!
Copying './resigned.ipa' to device... DONE.
Installing 'sg.vp.UnCrackable1'
Install: CreatingStagingDirectory (5%)
Install: ExtractingPackage (15%)
Install: InspectingPackage (20%)
Install: TakingInstallLock (20%)
Install: PreflightingApplication (30%)
Install: InstallingEmbeddedProfile (30%)
Install: VerifyingApplication (40%)
Install: CreatingContainer (50%)
Install: InstallingApplication (60%)
Install: PostflightingApplication (70%)
Install: SandboxingApplication (80%)
Install: GeneratingApplicationMap (90%)
Install: Complete
So now I can run the app on the device, and, if you’re following along, you should see something like this on your screen:
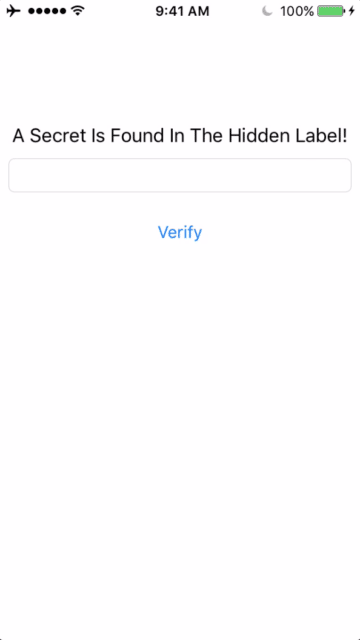
I’ll need to use the hint “A Secret Is Found In The Hidden Label!” to find the text needed to unlock the crackme.
If I don’t enter the right value, I get the following response:
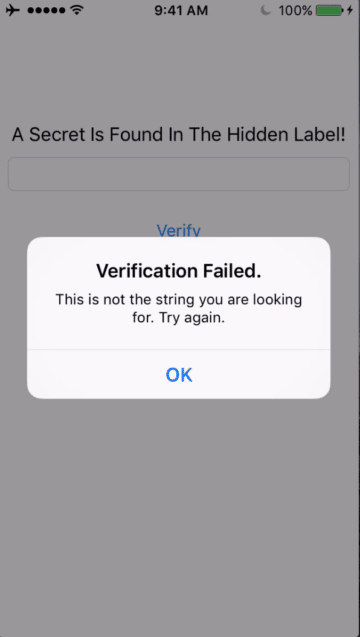
The hint
**SPOILER ALERT** — Past this point I’ll reveal spoilers, so proceed at your own risk.
Now I’m going to solve the crackme using the hint and some ingenuity. One thing I can try is dumping the view hierarchy of the application.
From Apple’s Documentation:
Only one window at a time can be the key window, and you can use a window’s keyWindow property to determine its status.
So I can use Frida while the app is running to interrogate the current `UIWindow` and its view hierarchy. With Frida and its python command line interface (CLI) tools installed I’ll do the following:
$ frida -U UnCrackable1
     ____
    / _  |   Frida 9.1.27 - A world-class dynamic instrumentation framework
   | (_| |
    > _  |   Commands:
   /_/ |_|       help      -> Displays the help system
   . . . .       object?   -> Display information about 'object'
   . . . .       exit/quit -> Exit
   . . . .
   . . . .   More info at http://www.frida.re/docs/home/

[USB::iPhone::UnCrackable1]->
Frida Objective-C API
You can learn more about the Obj-C APIs in Frida here. With these APIs in hand I can figure out how to bind to the `UIWindow`, get its `keyWindow` and then, with enough research, find the `recursiveDescription` function that will dump the entire view hierarchy for me to see.
Solving it
$ frida -U UnCrackable1
     ____
    / _  |   Frida 9.1.27 - A world-class dynamic instrumentation framework
   | (_| |
    > _  |   Commands:
   /_/ |_|       help      -> Displays the help system
   . . . .       object?   -> Display information about 'object'
   . . . .       exit/quit -> Exit
   . . . .
   . . . .   More info at http://www.frida.re/docs/home/

[USB::iPhone::UnCrackable1]-> w = ObjC.classes.UIWindow.keyWindow()
{
    "handle": "0x135e608a0"
}
[USB::iPhone::UnCrackable1]-> desc = w.recursiveDescription().toString()
"<UIWindow: 0x135d37880; frame = (0 0; 320 568); autoresize = W+H; gestureRecognizers = <NSArray: 0x135e33e40>; layer = <UIWindowLayer: 0x135d275d0>>
   | <UIView: 0x135e3f8c0; frame = (0 0; 320 568); autoresize = W+H; layer = <CALayer: 0x135e3f7d0>>
   |    | <UILabel: 0x135d41110; frame = (0 40; 82 20.5); text = 'i am groot!'; hidden = YES; opaque =NO; autoresize = RM+BM; userInteractionEnabled = NO; layer = <_UILabelLayer: 0x135e37c00>>
   |    | <UILabel: 0x135e3c040; frame = (0 110.5; 320 20.5); text = 'A Secret Is Found In The ...'; opaque = NO; autoresize = RM+BM; userInteractionEnabled = NO; layer = <_UILabelLayer: 0x135e3c5c0>>
   |    | <UITextField: 0x135d416f0; frame = (8 141; 304 30); text = ''; clipsToBounds = YES; opaque =NO; autoresize = RM+BM; gestureRecognizers = <NSArray: 0x135e4da90>; layer = <CALayer: 0x135d41c40>>
   |    |    | <_UITextFieldRoundedRectBackgroundViewNeue: 0x135d43ca0; frame = (0 0; 304 30); opaque = NO; autoresize = W+H; userInteractionEnabled = NO; layer = <CALayer: 0x135d44020>>
   |    | <UIButton: 0x135e39030; frame = (8 191; 304 30); opaque = NO; autoresize = RM+BM; layer = <CALayer: 0x135e39530>>
   |    |    | <UIButtonLabel: 0x135d34a70; frame = (132 6; 40 18); text = 'Verify'; opaque = NO; userInteractionEnabled = NO; layer = <_UILabelLayer: 0x135d37400>>
   |    | <_UILayoutGuide: 0x135e3fc20; frame = (0 0; 0 20); hidden = YES; layer = <CALayer: 0x135e3f870>>
   |    | <_UILayoutGuide: 0x135e393b0; frame = (0 568; 0 0); hidden = YES; layer = <CALayer: 0x135e37790>>"
If you look closely enough you’ll find the hidden `UILabel` with the secret:
| | <UILabel: 0x135d41110; frame = (0 40; 82 20.5); text = 'i am groot!'; hidden = YES; opaque =NO; autoresize = RM+BM; userInteractionEnabled = NO; layer = <_UILabelLayer: 0x135e37c00>>

There it is — “i am groot!”. I enter it into the box, hit verify, and I’m done:
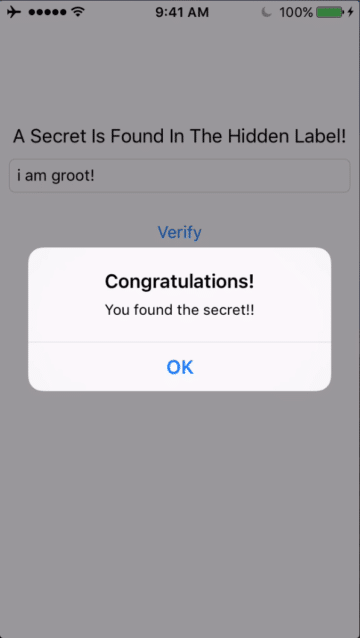
Great!
But I want to take this a little further…I can turn this into just about a single-line solution that fits into the margins of a tweet :-).
$ frida -q -U UnCrackable1 -e "ObjC.classes.UIWindow.keyWindow().recursiveDescription().toString();" |grep "UILabel.*hidden.*"
So as you can see, Frida is pretty cool!
Automation
What if I want to solve this puzzle again, or better yet — fully automate the process of entering the solution so that I don’t have to repeat myself? To make it happen I’ll use a NowSecure tool called “UI Automation Editor” to record and replay a UI automation script that will solve it for me — automatically, every time.
And here’s what the tool looks like:
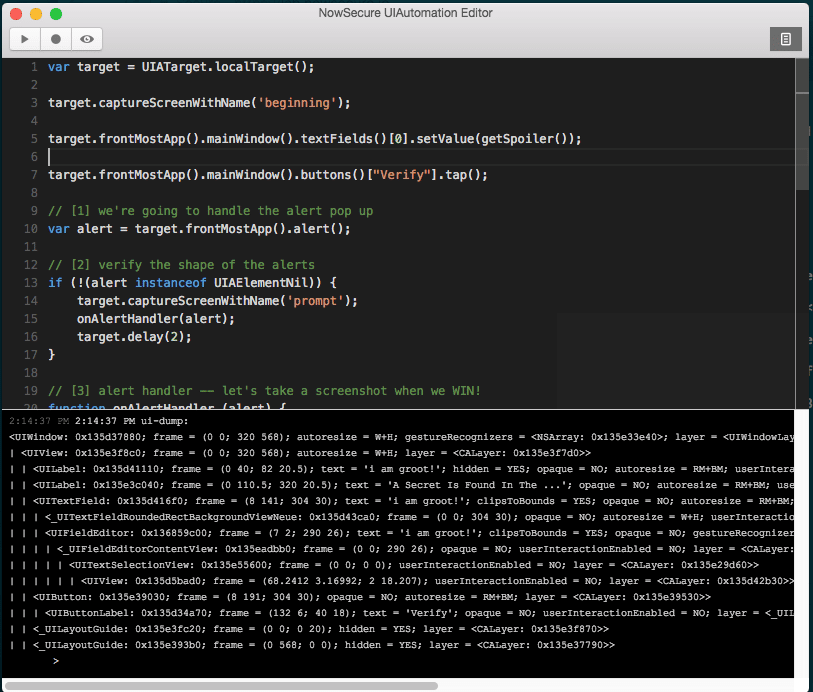
Basically there’s a built-in button to dump the view hierarchy and a “record” and “replay” button that is perfect for solving this particular crackme.
And here’s some video of the tool in action:
Part 1
Part 2
Part 3
Here’s what the UI Automation script ends up looking like after a few tweaks:
var target = UIATarget.localTarget();
target.captureScreenWithName('beginning');
target.frontMostApp().mainWindow().textFields()[0].setValue(getSpoiler());
target.frontMostApp().mainWindow().buttons()["Verify"].tap();
// [1] we're going to handle the alert pop up
var alert = target.frontMostApp().alert();
// [2] verify the shape of the alerts
if (!(alert instanceof UIAElementNil)) {
target.captureScreenWithName('prompt');
onAlertHandler(alert);
target.delay(2);
}
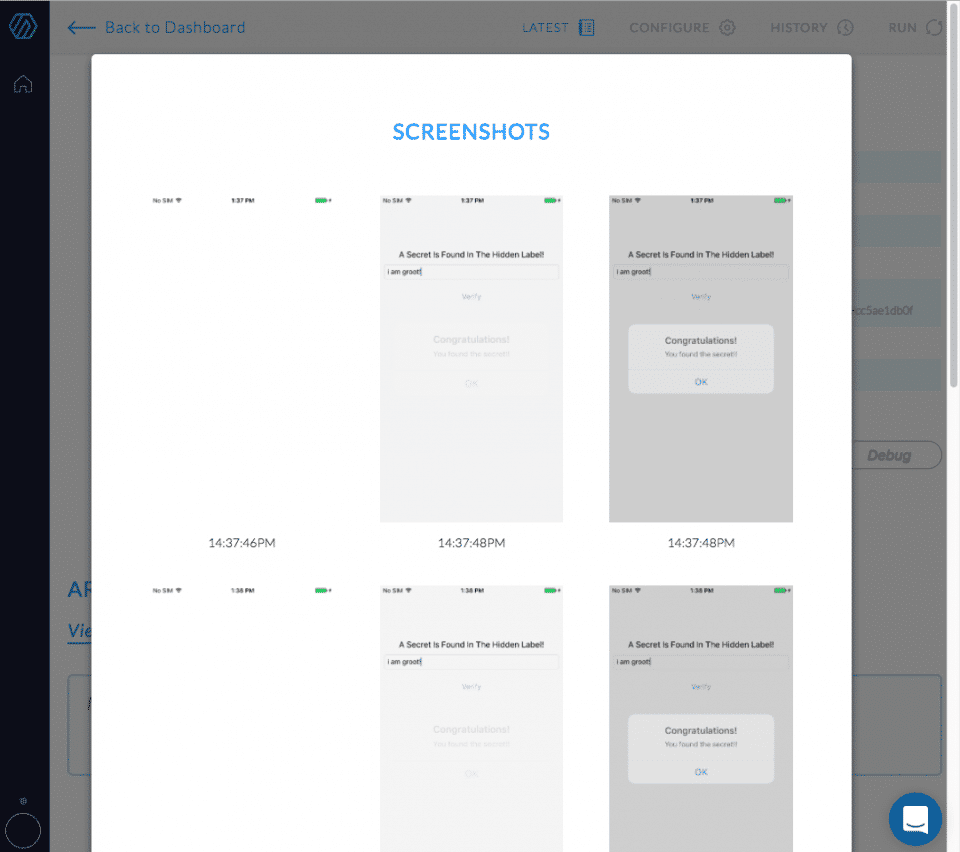
// [3] alert handler -- let's take a screenshot when we WIN!
function onAlertHandler (alert) {
UIALogger.logDebug('on alert handler');
target.captureScreenWithName('prompt'); // take a screenshot called 'prompt2'
var buttons = alert.buttons().toArray();
return true;
}
// SPOILER ALERT
function getSpoiler () {
return "i am groot!";
}
Full automation with NowSecure Lab Automated
Now what if we want to take this even further and remove the need for a device connected to our system. We could turn to a tool like NowSecure Lab Automated. The advantages of this approach is that Lab Automated handles re-signing the application, preparing a device, and running the app using the user-supplied UI automation script. Now we can beat the crackme over and over whenever we want!
I hope you’ve enjoyed this tutorial!